
Author: Saleem

Khajoor / Pakistani Energy balls

We call these khajoor, which is the word for dates but they're better described as Pakistani energy balls. Except they're not balls, they look more like dates – hence the name Khajoor.This is a recipe passed down for generations from my mums side of the family and is dedicated to my grandmother, Gul Zarina. It's made from nuts and flour, its a healthy and filling snack and the khajoor last up to 6 months in an airtight jar.My mum made these, I just took the pictures and the notes.The recipe is pretty versatile in terms of measurements, as many of my mum's recipes are 🙂 so there isn't a measuring jug or scales in sight but don't let that put you off.The measures given below are approximate, just use a small packet or there abouts.
Ingredients
- 150 grams pistachios peeled
- 150 grams almonds plain
- 150 grams cashews plain
- 4 tbsp fennel seeds
- 1 cup desiccated coconut
- 1 cup semolina coarse
- 1 cup plain flour
- 4 cups chapati flour
- 2 cups caster sugar
- 125 grams butter
Instructions
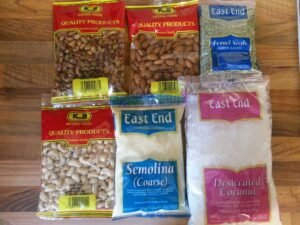
- Here are some of the raw ingredients.
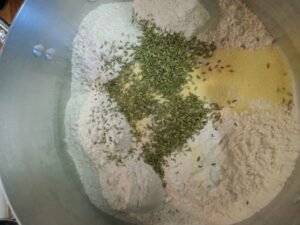
- First, grind down the pistachios, almonds and cashews in a food processor and throw into a large bowl.
- Add in the semolina, plain flour, chapatti flour, desiccated coconut and fennel.
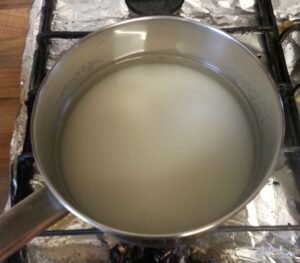
- Grab a pan and throw in 2 cups of sugar and 1 cup of water. Heat the water to dissolve the sugar and allow to cool.
- In the meantime, ever so slightly melt 125g of butter in the microwave. Rub the butter thoroughly into the dry mixture.
- Once cooled add in the the sugar water to the dry mixture.
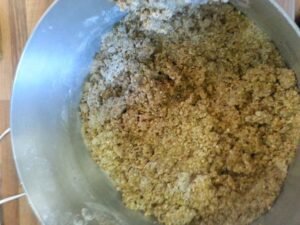
- Knead the mixture, it gets pretty sticky but keep going.
- Eventually it will get too thick to move easily and your hands will be caked in sticky mixture.
- Grab a bowl of water, dip your hands in and carry on, this will help you get the mixture off your hands and form a lump out of the dough.
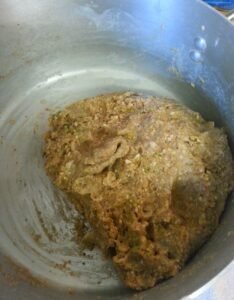
- To make the khajoor shape start by making a small ball, squash it down a little while rolling, then using your fingers squash it down and gently scrape down your fingers to form the shell. The shells need to be small enough so that they cook through.
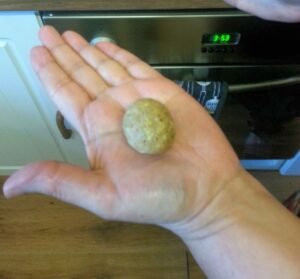
- Let’s do this step by step.
- Roll into a ball
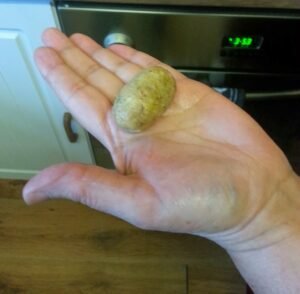
- Roll into a fat tube
- Squash with fingertips
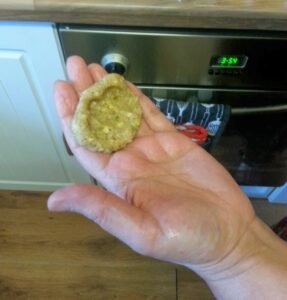
- Roll
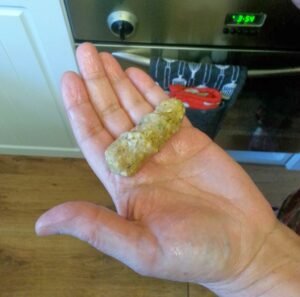
- Done
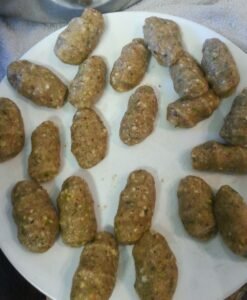
- Now, we’re going to deep fry these so half fill a wok with vegetable oil. Get the oil to around 150℃ to 160℃
- Once you are happy with your mixture, make up a plate full of shells.
- Gently place as many shell as you can fit under the oil. Stir frequently until the shells turn light brown.

- Using a serrated spoon lift out the cooked khajoor rinsing as much oil as you can.
- Repeat in batches until you have a bowl full of delicious khajoor. you can eat them hot or cold with tea or on their own.

- Once the khajoor are cold you can store then in an air tight container for up to six months.
If you have any leftover …
Khajoor aren’t really “leftovers” in the normal sense — they last six months, they’re shelf‑stable, and they’re snacks, not meals. So instead of forcing leftover transformations let me suggest some ways of combining them with other things:
Khajoor with Porridge Chop one or two khajoor and stir into hot porridge. The nuts add crunch, the sugar syrup melts slightly, and the fennel gives a warm flavour. Turns plain porridge into a proper breakfast.
Khajoor with Yoghurt Roughly chop khajoor into small pieces and mix into yoghurt. The sweetness balances the tang, the nuts add texture, and it becomes a quick, filling snack — basically a Pakistani granola bowl 🙂
Khajoor with Tea The classic pairing. Eat khajoor alongside hot tea. The heat softens the shell, the sweetness comes through, and it becomes a perfect afternoon snack.
Khajoor Crumble Topping Grate or finely chop khajoor and sprinkle over fruit (like apples or berries). The nuts and coconut act like a crumble topping, and the sugar syrup melts slightly — no baking needed.
Khajoor Energy Snack Plate Serve khajoor with nuts, fruit, or cheese as part of a small snack plate. They add sweetness and crunch, and make the plate feel more substantial.
- Khajoor with Porridge
- Khajoor with Yoghurt
- Khajoor with Tea
- Khajoor Crumble Topping
- Khajoor Energy Snack Plate
Khajoor with Porridge Chop one or two khajoor and stir into hot porridge. The nuts add crunch, the sugar syrup melts slightly, and the fennel gives a warm flavour. Turns plain porridge into a proper breakfast.
Khajoor with Yoghurt Roughly chop khajoor into small pieces and mix into yoghurt. The sweetness balances the tang, the nuts add texture, and it becomes a quick, filling snack — basically a Pakistani granola bowl 🙂
Khajoor with Tea The classic pairing. Eat khajoor alongside hot tea. The heat softens the shell, the sweetness comes through, and it becomes a perfect afternoon snack.
Khajoor Crumble Topping Grate or finely chop khajoor and sprinkle over fruit (like apples or berries). The nuts and coconut act like a crumble topping, and the sugar syrup melts slightly — no baking needed.
Khajoor Energy Snack Plate Serve khajoor with nuts, fruit, or cheese as part of a small snack plate. They add sweetness and crunch, and make the plate feel more substantial.


Tandoori Chicken
This is the simplest way to make delicious tandoori chicken. Sure there are loads of recipes out there with 10s of ingredients and overnight marinating – we're not doing that today, this is kids-are-hungry, the-time-is-now-not-yesterday tandoori chicken. It works and there are only 2 essential ingredients, one of which is the actual chicken.We have literally make this at least once a month for the past 15 years, in every increasing quantities as the kids have grown.The surprising thing is how easy this recipe is, you can't even call it a recipe – I don't know what to call it so lets just get on with the description.I'm revisiting this recipe after the kids are grown up and laughing at the quantity of chicken. We now use at least 4 kgs of chicken to make sure everyone has enough 🙂
Ingredients
- 1 kg chicken skinned with skin, bones, no bones, its all good.
- 4-5 tbsp tandoori masala
- 1 tsp ajwain seeds optional
Instructions
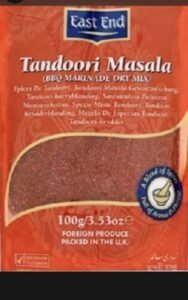
- Tandoori masala, available at tescos.
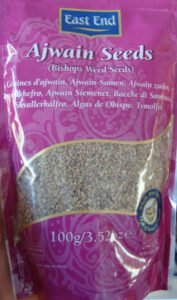
- Ajwain seeds, optional but great for digestion. Available at most Indian/Pakistani stores if not at Tescos.
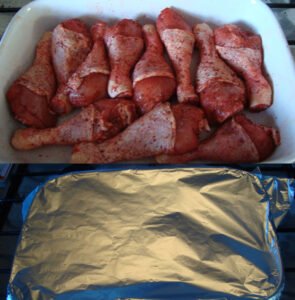
- Throw the chicken into a bowl, sprinkle on the tandoori powder and ajwain seeds, if using.

- Work in the spices with your hands until everything is red even your hands !!
- Now wash you hands unless you want red hands for the rest of the day.
- Cover tightly with aluminium foil and place into the oven on around 180 ℃. Leave for 45 minutes so that the chicken is cooked through.
- After 45 minutes take the chicken out of the oven and very carefully remove the aluminium foil.
- I used to put the chicken under the grill to get it crispy and run off the fat, as you can see in the pictures.

- Now, we just pour off the juices into a glass bowl and put the same tray back in the oven for 15 minutes
- If grilling, turn a couple of times and grill for around 15 minutes.
- That’s it, enjoy with rice or potato wedges, rice or chips.
If you have any leftover …
I dont even need to tell you what to do with this, there are so many options, but OK, I’ll list a few…
Tandoori Chicken Wrap Slice leftover tandoori chicken, add lettuce, onions, and yoghurt into a tortilla, roti, paratha or Lebanese flatbread and roll tight. The smoky chicken and cool yoghurt make a perfect quick wrap.
Tandoori Chicken Rice Bowl Serve sliced tandoori chicken over hot rice with the tray juices spooned on top. Add yoghurt or coriander if you have them. A simple, filling bowl.
Tandoori Chicken Pasta Mix chopped tandoori chicken with cooked pasta and a spoon of yoghurt or cream. The spices mellow into a creamy sauce, turning leftovers into a quick fusion pasta.
Tandoori Chicken Quesadilla Chop leftover tandoori chicken, mix with a little yoghurt, spread inside a tortilla with cheese, and pan-fry until crisp. The smoky chicken and melted cheese make a brilliant quesadilla.
Tandoori Chicken Loaded Fries Shred and pile tandoori chicken over hot fries, drizzle mayo or whatever other sauces you want. It becomes a spicy, smoky loaded fries dish — cheap and very student-friendly.
Tandoori Chicken Sandwich Layer sliced tandoori chicken with lettuce and mayo inside bread or a roll, do you have mango chutney? The spices cut through the mayo, making a simple but excellent sandwich.
Tandoori Chicken Salad Bowl Add sliced tandoori chicken to any salad (lettuce, tomatoes, cucumbers, avocados, corn, croutons). The smoky flavour turns a basic salad into a full meal, especially with a yoghurt dressing.
- Tandoori Chicken Wrap
- Tandoori Chicken Rice Bowl
- Tandoori Chicken Pasta
- Tandoori Chicken Quesadilla
- Tandoori Chicken Loaded Fries
- Tandoori Chicken Sandwich
- Tandoori Chicken Salad Bowl
Tandoori Chicken Wrap Slice leftover tandoori chicken, add lettuce, onions, and yoghurt into a tortilla, roti, paratha or Lebanese flatbread and roll tight. The smoky chicken and cool yoghurt make a perfect quick wrap.
Tandoori Chicken Rice Bowl Serve sliced tandoori chicken over hot rice with the tray juices spooned on top. Add yoghurt or coriander if you have them. A simple, filling bowl.
Tandoori Chicken Pasta Mix chopped tandoori chicken with cooked pasta and a spoon of yoghurt or cream. The spices mellow into a creamy sauce, turning leftovers into a quick fusion pasta.
Tandoori Chicken Quesadilla Chop leftover tandoori chicken, mix with a little yoghurt, spread inside a tortilla with cheese, and pan-fry until crisp. The smoky chicken and melted cheese make a brilliant quesadilla.
Tandoori Chicken Loaded Fries Shred and pile tandoori chicken over hot fries, drizzle mayo or whatever other sauces you want. It becomes a spicy, smoky loaded fries dish — cheap and very student-friendly.
Tandoori Chicken Sandwich Layer sliced tandoori chicken with lettuce and mayo inside bread or a roll, do you have mango chutney? The spices cut through the mayo, making a simple but excellent sandwich.
Tandoori Chicken Salad Bowl Add sliced tandoori chicken to any salad (lettuce, tomatoes, cucumbers, avocados, corn, croutons). The smoky flavour turns a basic salad into a full meal, especially with a yoghurt dressing.